Setting up LAMP stack for production use on Ubuntu 16.04
LAMP stack is a set of open source software which typically consists of Linux, Apache, Mysql, and PHP. These are very useful in building web applications ranging from basic websites to complex E-commerce sites. In this post, I'll walk you through the steps required to set up a complete LAMP stack for Production use.
I'm assuming that you have SSH access to your server and your domain is pointing to your server. Steps required for it may differ based on the provider you are using. If you have queries related to this then feel free to connect with me.
Ok, Let's start.
1. Setting up Apache
The first thing we'll need to do is update our package lists so that we get the latest stable versions of the software that we'll install.sudo apt-get updateThen, we'll install Apache using the following command:
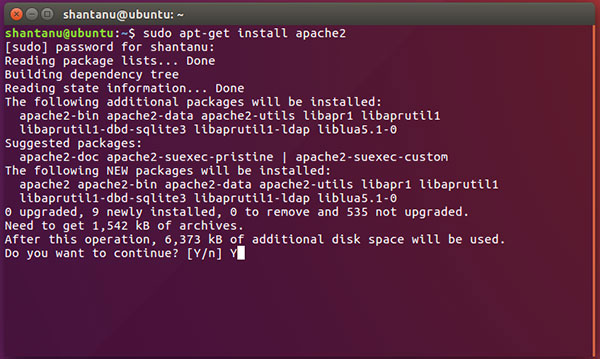
sudo apt-get install apache2It will ask you enter the password, just enter your password and press 'Enter'. Once this is done it will show how much space it will need to install the required packages and dependencies, just press Y and then press Enter.
Now we'll set up our domain name so that apache knows when to accept incoming connections. For this, we just need to add the Server Name and Alias to the apache config file. Open the file with the following command,
sudo nano /etc/apache2/apache2.confand modify the following values.
    ServerName dshantanu.com
    ServerAlias www.dshantanu.com
Make sure to replace your domain name instead of dshantanu.com. We'll test if the config is correct or not by using the configtest command.
sudo apache2ctl configtestIt should say Syntax ok
Now we'll restart apache so that it reloads the modified config file.
sudo systemctl restart apache2`We'll also need to allow incoming traffic to apache in our firewall. This can be done using the following command.
sudo ufw allow in "Apache Full"Now if you goto your domain name, you should see the apache default page.
2. Setting up MYSQL
Now we'll install mysql using the ubuntu package manager.
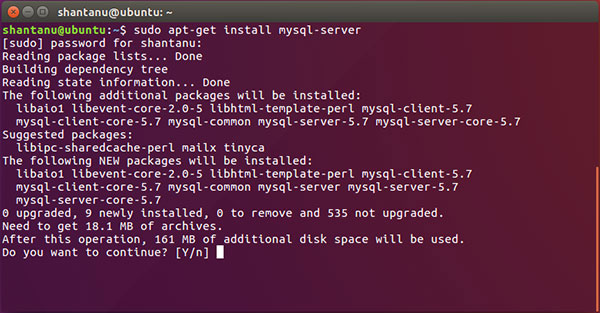
sudo apt-get install mysql-serverIt will show how much space it will need to install the required packages and dependencies, just press Y and then press Enter.
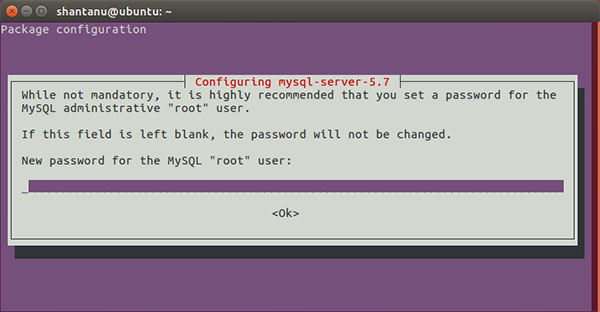
It will then ask you for a root password, make sure to use a strong and unique password as this user will have full access to your database.
4. Securing MySQL
We'll use the mysql_secure_installation to secure our mysql installation. Just run the following command,mysql_secure_installationYou'll be asked for the MySQL password, enter it and press enter. Then you'll be asked to configure a password policy for MySQL users, if you enable this then MySQL will reject any week credentials that you try to create. This may cause some issues when you are trying to install phpmyadmin, but I'll still recommend enabling it. To enable it press Y
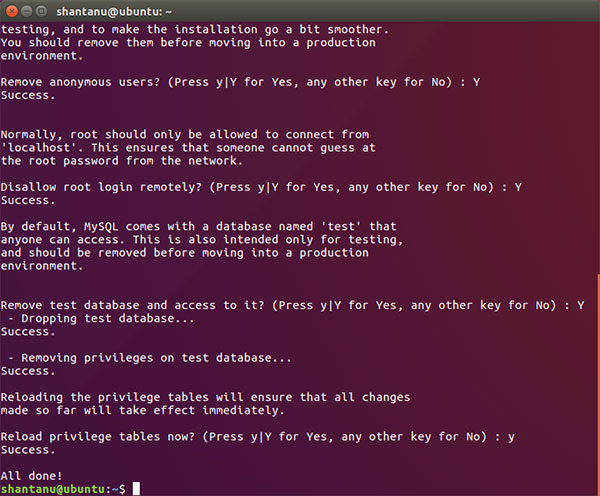
Then it will ask you how secure you need the password to be, select STRONG by entering 1
When it asks if you need to change root password, then just say No, we recently set it. (Change it if its a weak password), Then for the remaining steps enter Y for all. It will remove unwanted tables, users and other stuff that is not useful for us but can be useful for outside hackers.
5. Installing up PHP
To make sure php runs with apache and mysql we'll need the `libapache2-mod-php`, `php-mcrypt` and `php-mysql` helper packages. We can install them along with php using the following command,sudo apt-get install php libapache2-mod-php php-mcrypt php-mysqlWe'll also need to set up the priority of the files that are served by apache in the directory config file of apache. For this we'll edit the /etc/apache2/mods-enabled/dir.conf file and change the sequence to give php files priority.
Before
    <IfModule mod_dir.c>
       DirectoryIndex index.html index.cgi index.pl index.php index.xhtml index.htm>
    </IfModule>
After
    <IfModule mod_dir.c>
       DirectoryIndex index.php index.html index.cgi index.pl index.xhtml index.htm
    </IfModule>
save the file using Ctrl+X and press Enter. We'll restart apache so that it loads the recent dir.conf file.
sudo systemctl restart apache2Testing our setup
To make sure we have successfully installed the the LAMP stack, create a file in the server root as follows:sudo nano /var/www/html/index.phpIn the file add the following code and save,
<?php
  phpinfo();
?>
Now go to your domain name, it should display PHP information instead of the Apache Info Page. We'll remove this file so that information about out setup is not known to anyone else.
sudo rm /var/www/html/index.php7. Enabling SSL
SSL is important for the security of your site and its users. There are many certificate authorities that provide you an SSL certificate, but we'll use a TLS/SSL certificate from letencrypt.org as its free and its renewal can be fully automated.Certbot is an official letencrypt client and is also available in the Ubuntu software repository. We can add the certbot repository info to our local package lists using the following command,
sudo add-apt-repository ppa:certbot/certbotIf it asks for your password then enter it and press Enter. Now to update the local package list use,
sudo apt-get updateThen we'll install Certbot using the following command,
sudo apt-get install python-certbot-apacheIt will ask for confirmation, just press Y and then press Enter. Once certbot is installed, we can install the SSL certificate using the following command. Make sure to change dshantanu.com to your own domain name.
sudo certbot --apache -d dshantanu.comIt will ask you some basic info like email address, etc. Make sure to use a valid email as it will send you an email if certbot fails to renew your certificate. Once it's done installing the certificate, it will ask you if you want to forcefully redirect all http requests to https, I'll recommend doing it. Once you select an option and press Enter it will display the path at which your certificate is stored. Our SSL certificate is now installed.
To verify if everything is working you can go to your website to see if the browser shows https. We can also use the HTTPS lookup tool to check if our certificate was installed correctly.
We can also verify if the autorenewal using certbot using the dry run command as follows,
sudo certbot renew --dry-runIf there are no errors then your certificate will automatically get renewed whenever required. If the automated process of renewal fails it will send an email to your email which you used in the previous step.
And Done! We have setup LAMP stack on Ubuntu 16.04 with SSL security.
Hope you find this post useful. If you have any queries, feel free to connect with me at https://twitter.com/askShantanu

