
Optimised Image Manipulation on Android devices with Renderscript
article
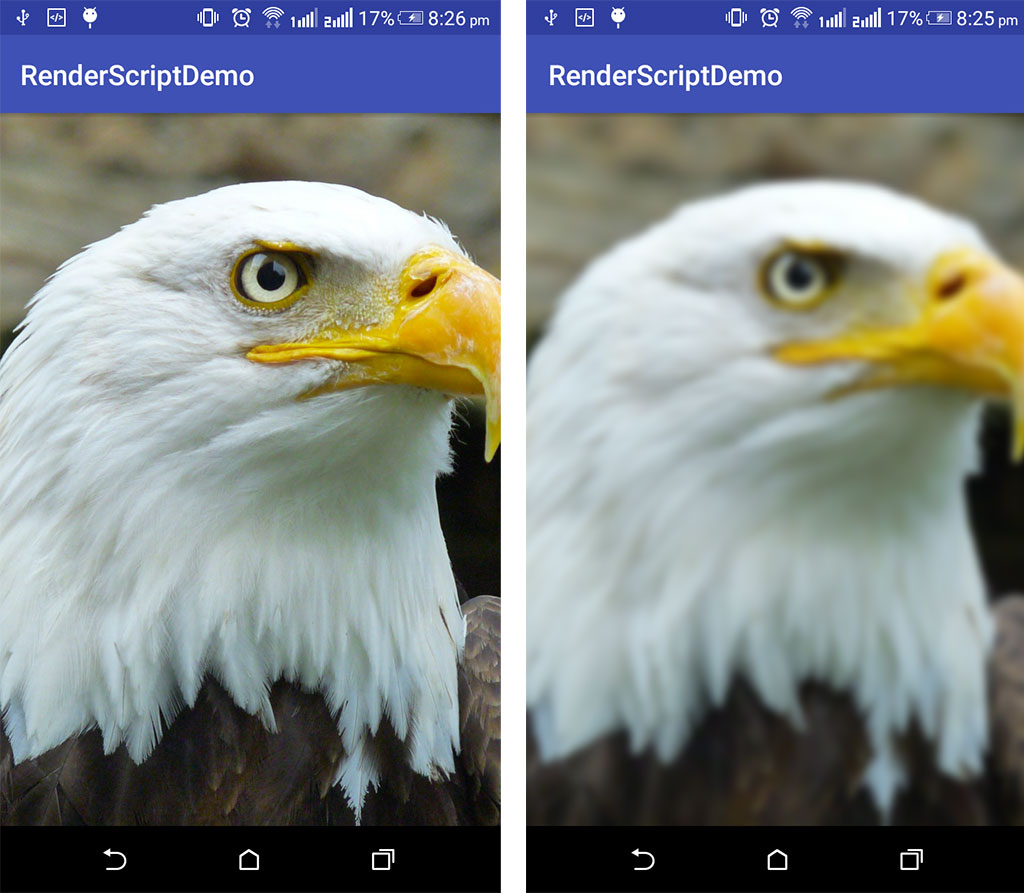
In this article, we will see how we can use the RenderScript framework to apply a blur effect to an image.
The renderscript framework was introduced in Android 3.0 (API level 11) for achieving better performance while running computationally intensive tasks on Android devices. The main benefit of using renderscript if that you don't have to worry about the underline hardware of the device on which your app is running. The framework also tunes performance based on the underline hardware and the type of workload at runtime.
Adding renderscript to your project
- Add the following lines in your app level gradle file inside defaultConfig section,
renderscriptTargetApi 18
renderscriptSupportModeEnabled true- For reusing the code we'll create a util file named BlurUtils.java and add a method for applying Gaussian Blur.
import android.content.Context;
import android.graphics.Bitmap;
import android.support.v8.renderscript.Allocation;
import android.support.v8.renderscript.Element;
import android.support.v8.renderscript.RenderScript;
import android.support.v8.renderscript.ScriptIntrinsicBlur;


public class BlurUtils {

   private static final float BITMAP_SCALE = 0.4f;

   //Set the radius of the Blur. Supported range 0 < radius <= 25
   private static float BLUR_RADIUS = 10.5f;

   public Bitmap blur(Context context, Bitmap image, float blurRadius) {

       Bitmap outputBitmap = null;

       if (image != null) {

            if (blurRadius == 0) {
                return image;
            }
            if (blurRadius < 1) {
                blurRadius = 1;
            }
            if (blurRadius > 25) {
                blurRadius = 25;
            }
            BLUR_RADIUS = blurRadius;

            int width = Math.round(image.getWidth() * BITMAP_SCALE);
            int height = Math.round(image.getHeight() * BITMAP_SCALE);

            Bitmap inputBitmap = Bitmap.createScaledBitmap(image, width, height, false);
            outputBitmap = Bitmap.createBitmap(inputBitmap);

            RenderScript rs = RenderScript.create(context);
            ScriptIntrinsicBlur theIntrinsic = ScriptIntrinsicBlur.create(rs, Element.U8_4(rs));
            Allocation tmpIn = Allocation.createFromBitmap(rs, inputBitmap);
            Allocation tmpOut = Allocation.createFromBitmap(rs, outputBitmap);
            theIntrinsic.setRadius(BLUR_RADIUS);
            theIntrinsic.setInput(tmpIn);
            theIntrinsic.forEach(tmpOut);
            tmpOut.copyTo(outputBitmap);
        }
        return outputBitmap;
    }
}
Using renderscript to blur images
1. We'll use an ImageView to display the image,<ImageView
android:id="@+id/iv_background_image"
android:layout_width="match_parent"
android:layout_height="match_parent"
android:scaleType="centerCrop"
android:src="@drawable/background" />
- Then in our activity file we'll get the bitmap from the imageview, apply blur to it and set to back the imageview,
ImageView ivBackground = (ImageView) findViewById(R.id.iv_background_image);
Bitmap bitmap = ((BitmapDrawable) ivBackground.getDrawable()).getBitmap();

//Applying Gaussian blur effect with radius "10.5"
ivBackground.setImageBitmap(new BlurUtils().blur(MainActivity.this, bitmap, 10.5f));
- That's it, now we can run our application. When you run your application, you'll see the output similar to the right side image.
Performance
When applying a Gaussian Blur to an image of dimension 1334*1001 it took more than a second to complete using the older approach from here, but it took only 160ms to apply Gaussian Blur to the same image when using RenderScript.Hope you find this post useful. If you have any queries, feel free to connect with me at https://twitter.com/askShantanu